
1. What a batch is
A batch is a quantity of one product that expires on one date: 24 tubs of yogurt best before 14 March, 12 bottles of vitamin D that expire in June. Shopify tracks how many units you have; Datima tracks which units, by date. Everything else in the app — the dashboard, the alerts, the automatic deductions — is built on batches you record.
Only two things are required for each batch: the expiry date and the quantity. A lot code, a bin location and a note are there when you want them and never in the way when you don't.
2. Add your first batch
When you open the app for the first time, the dashboard shows a short checklist. Your catalog is already synced — that step is done for you, with your own product and variant counts.
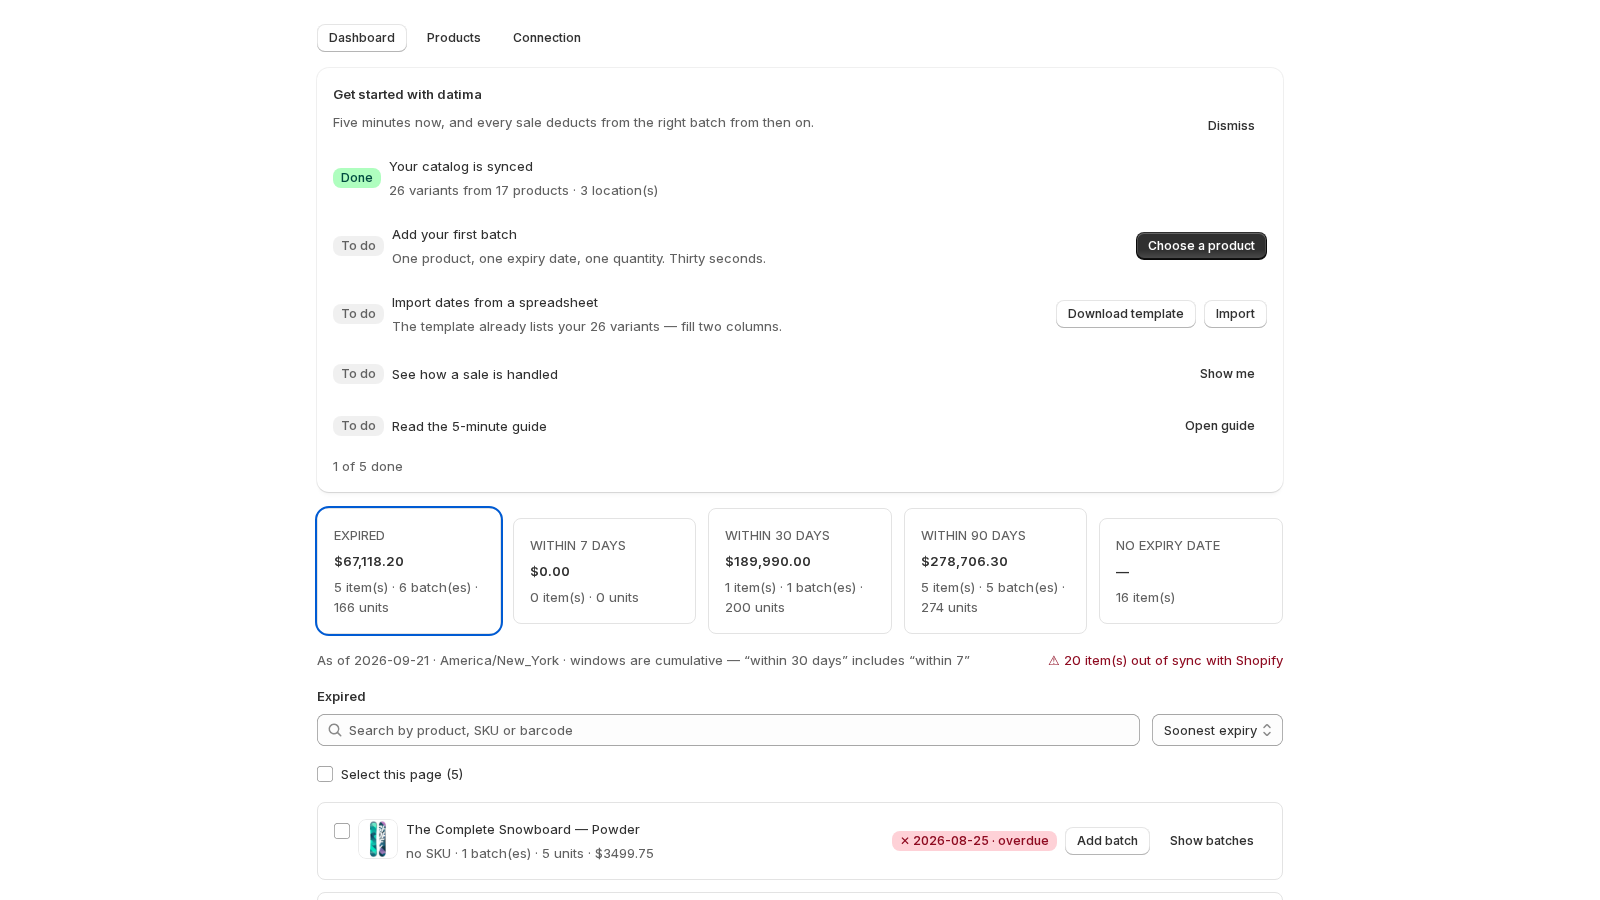
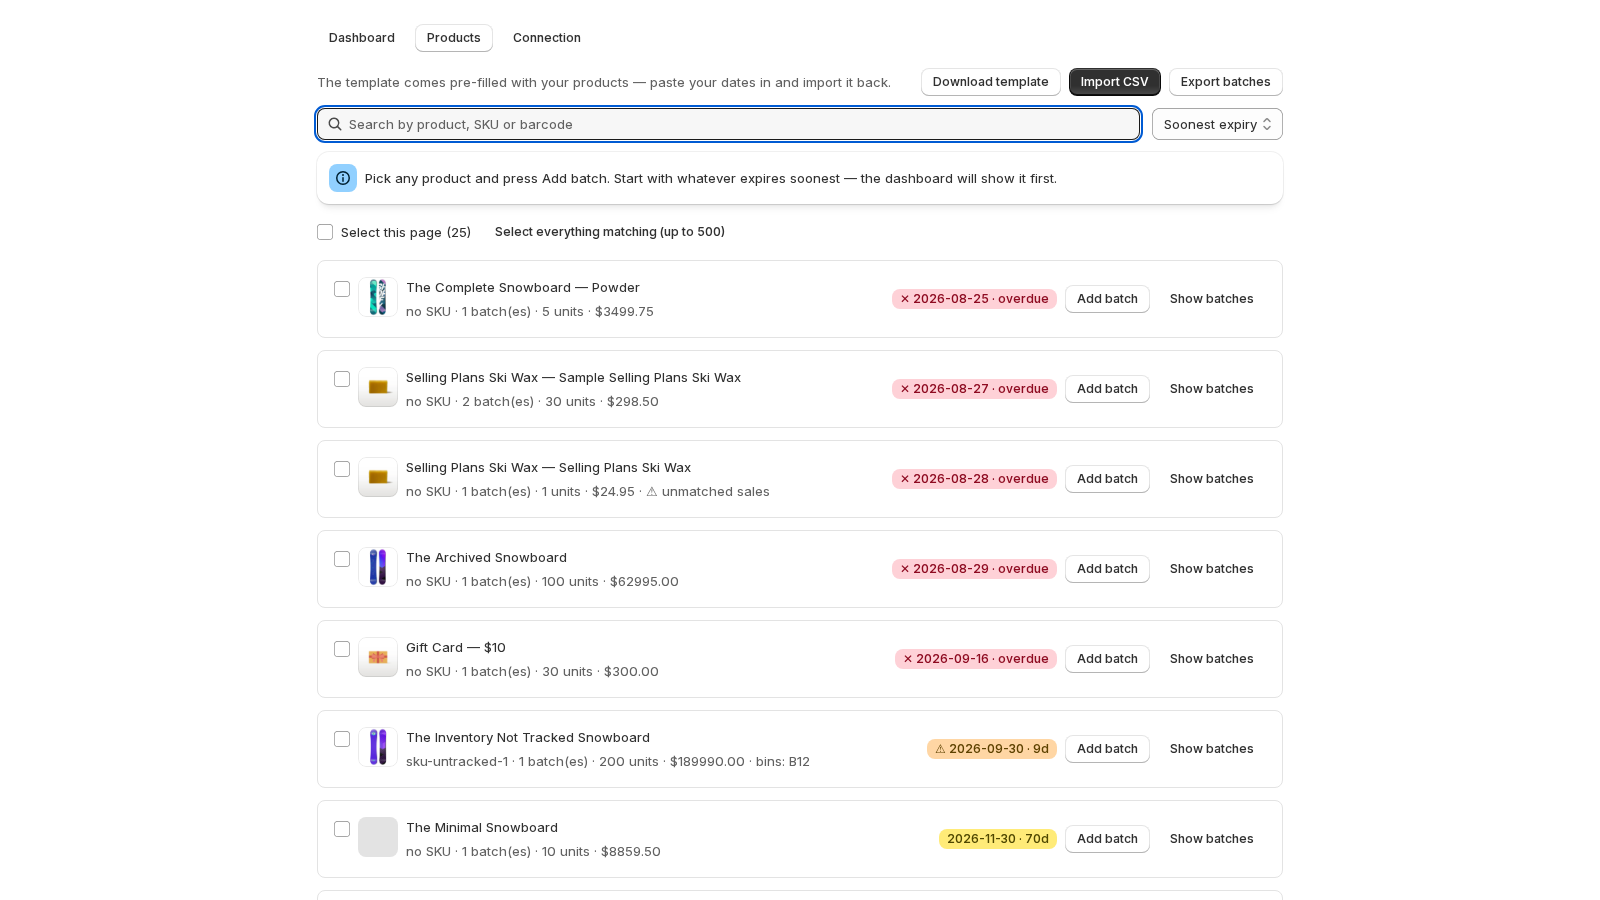
Press Choose a product. You land on your product list with the search ready. Pick anything — the product that expires soonest is a good first choice — and press Add batch.
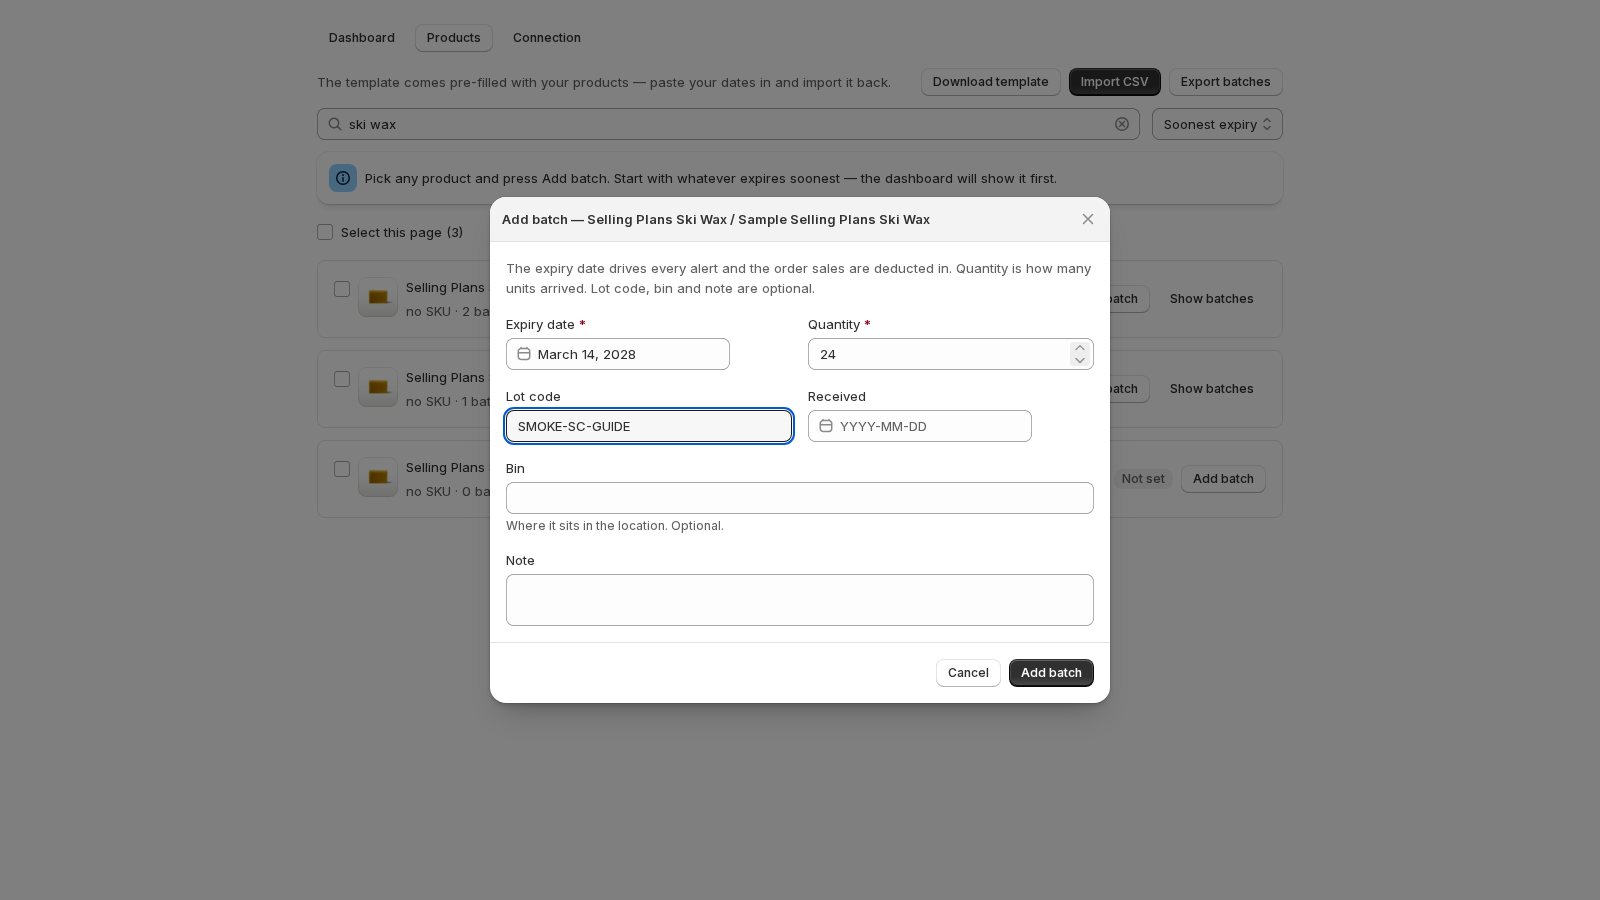
Type the expiry date and how many units arrived. The first time, the form explains what each field drives; after that it stays out of your way.
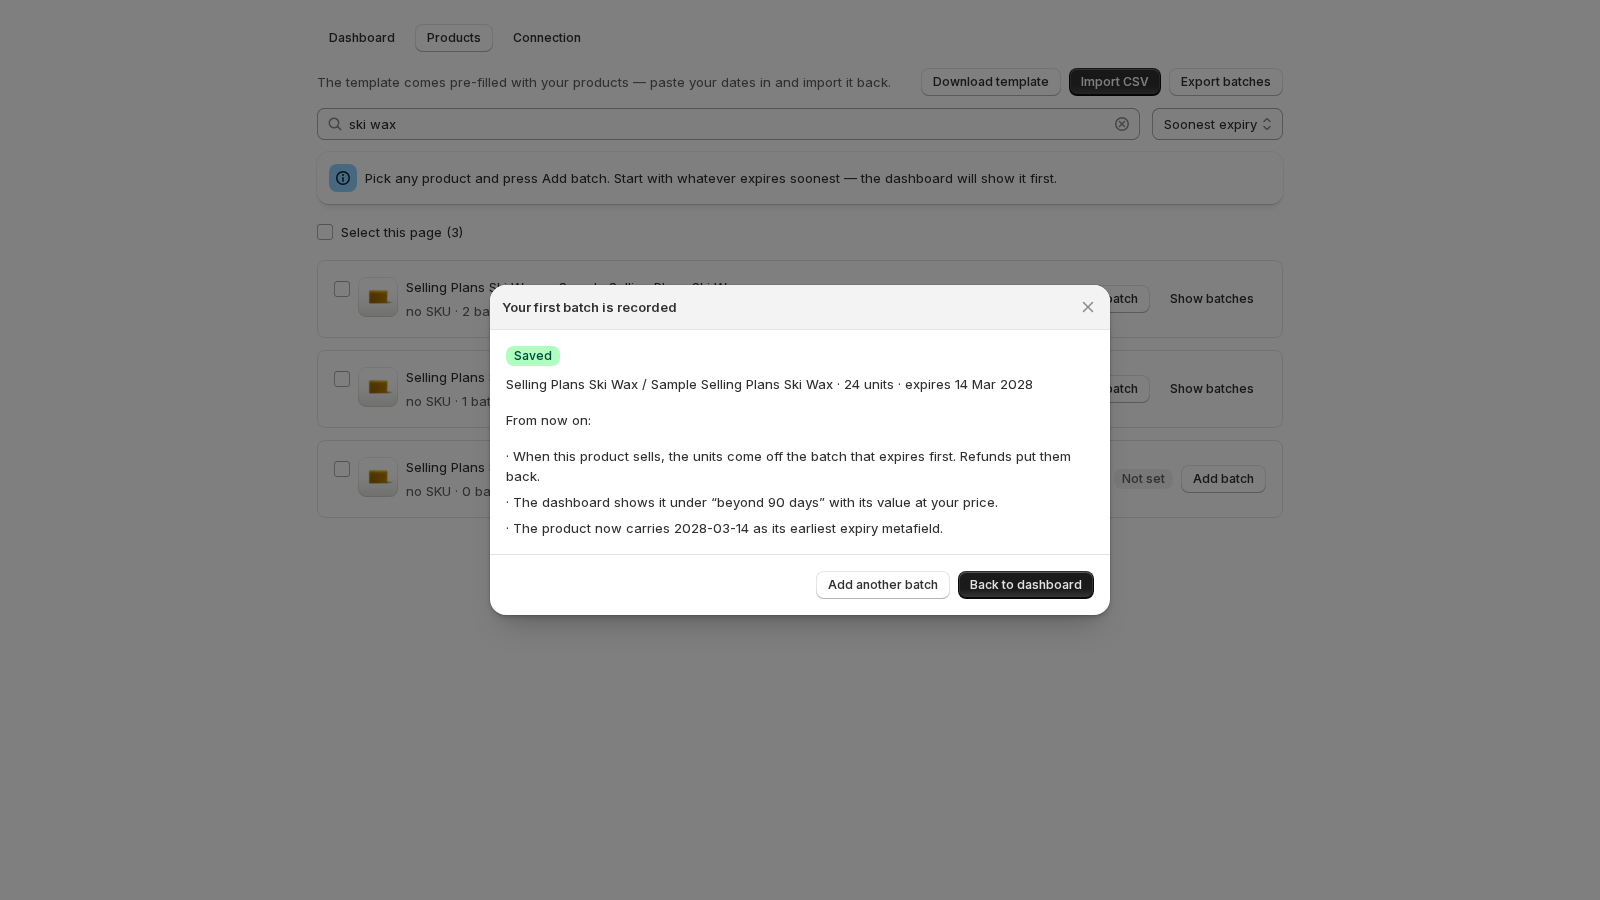
Save, and the app tells you what happens next: which dashboard card the batch lands on, that sales will deduct from the earliest-expiring batch first, and that the product now carries its earliest expiry date as a metafield your theme can read.
3. Import from a spreadsheet
With hundreds of products, one at a time is the wrong tool. Open Products → Import CSV. The first step downloads a template that already lists every variant in your store — you fill in two columns and upload the same file back.
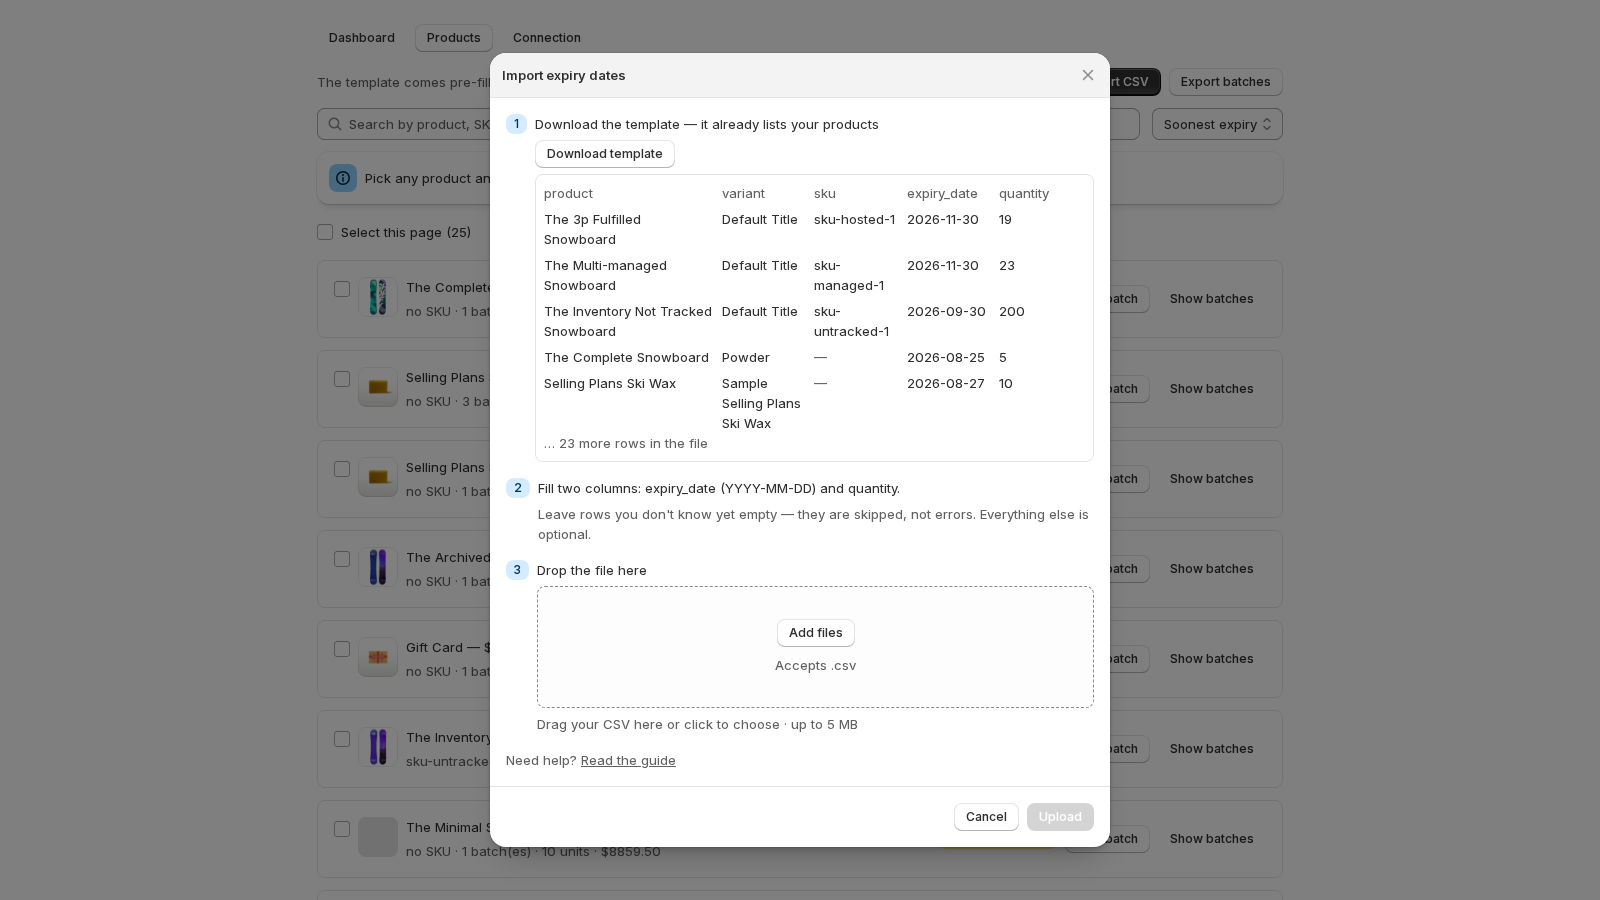
| Column | Required | Example |
|---|---|---|
sku or variant_id | pre-filled | YOG-500 |
expiry_date | yes | 2027-03-14 |
quantity | yes | 24 |
lot_code | no | A3155 |
location | no | Main Warehouse |
bin | no | COLD-A-11 |
received_date | no | 2026-09-01 |
Fill in only the rows you know. Rows you leave blank are skipped, not errors. Dates go in as YYYY-MM-DD. Nothing is written until you confirm: the review step shows how many rows are ready, how many were skipped, and lists any row it could not read.
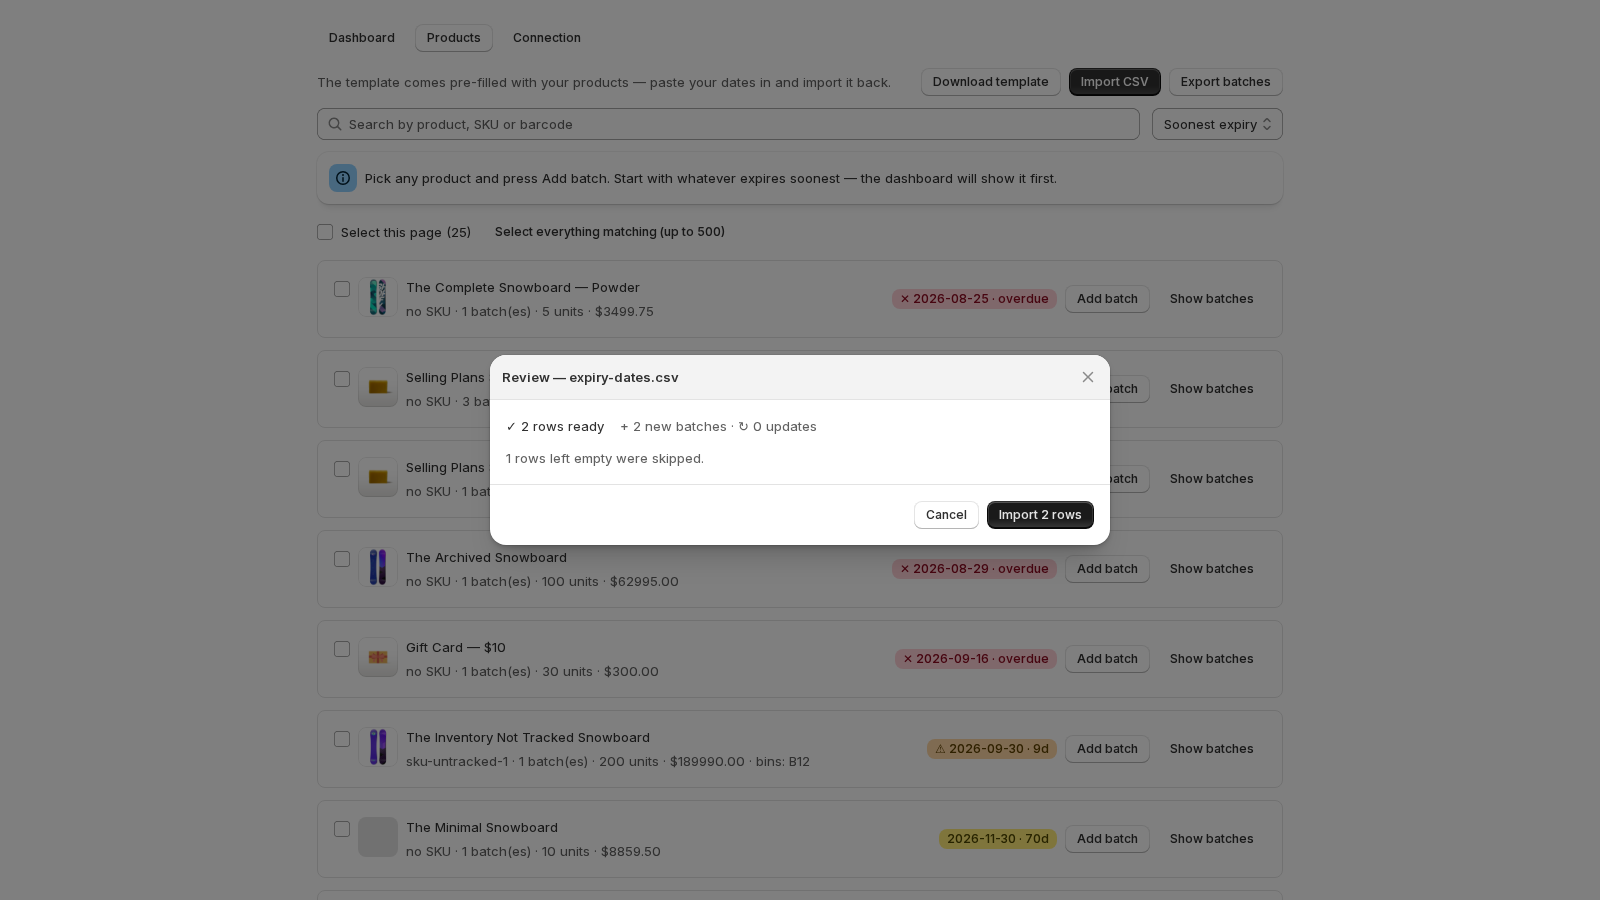
If some rows fail, you can import the good ones now and download the failed rows as a file in the same shape as the template — fix the values and upload that file again.
4. Set one date for many products
Same delivery, same date, many products? On the product list, tick the rows (or Select everything matching a search) and press Add batch to all…. One expiry date and one quantity create a batch on every selected product at once, all or nothing. The same bar can later set a new date or shift every batch of the selected products by a number of days.
5. What happens on a sale
From the moment a product has a batch, Datima watches your orders:
- When an order ships, the units come off the batch that expires first. If that batch runs out, the next one is used. This is first-expired-first-out, and it happens without anyone touching the app.
- A refund puts the units back on the batch they came from.
- A sale the batches cannot cover — more sold than recorded — is shown on the dashboard as unmatched sales, so you know which products still need their dates entered. Nothing is invented.
- Each variant carries its earliest expiry date as a metafield (
expiry.earliest_expiry), so your theme, Shopify Flow or another app can read it.
Show the date on your product page
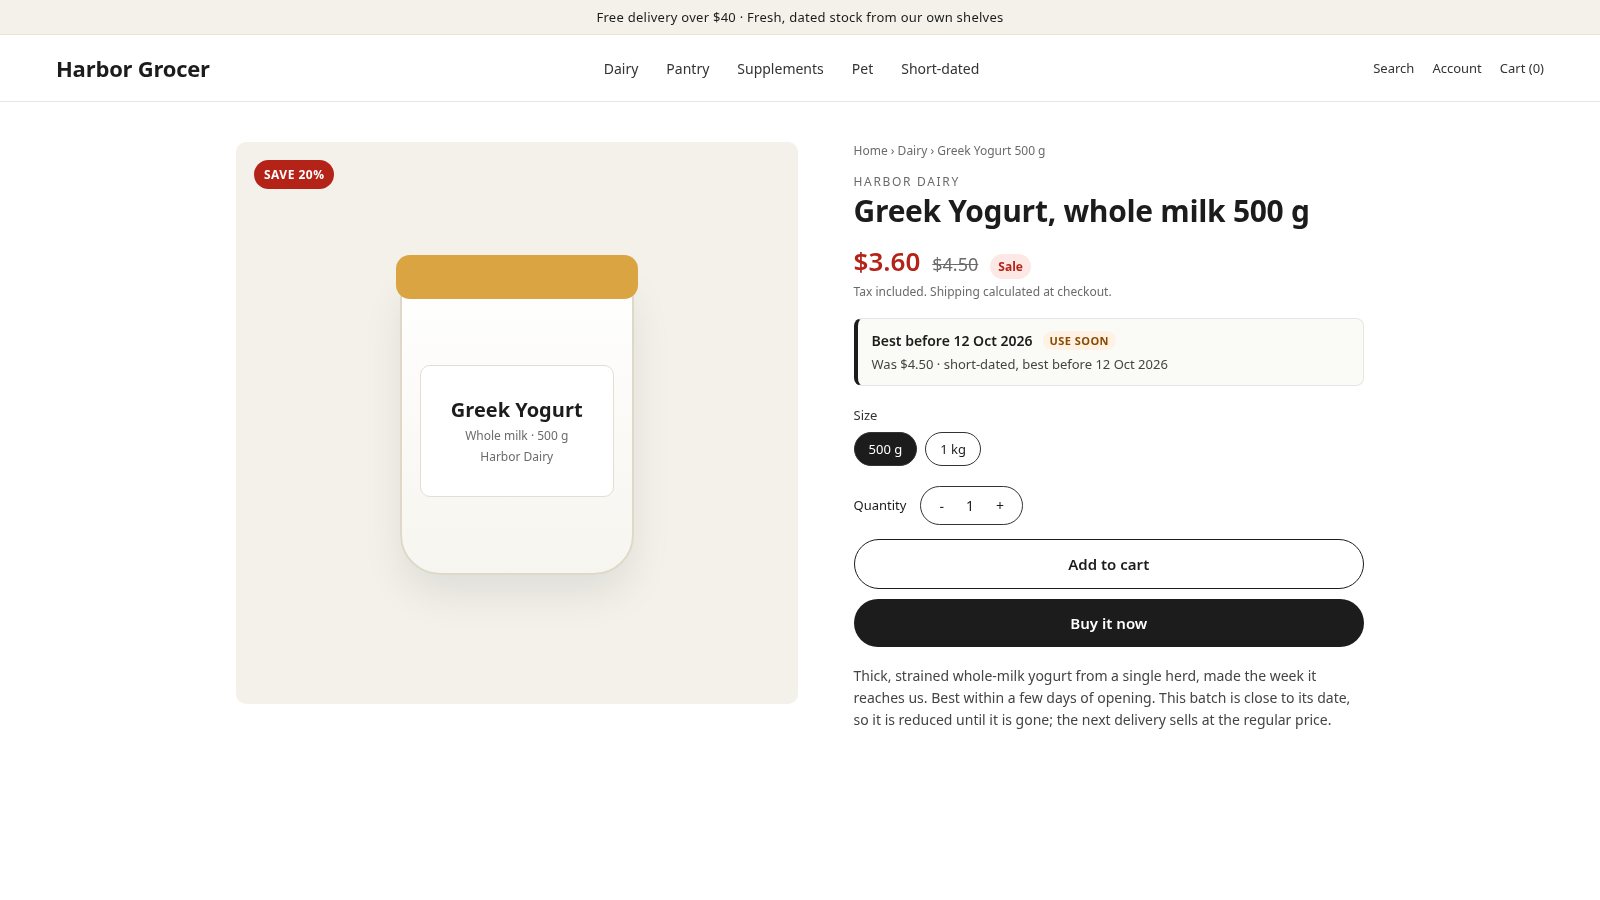
No code needed. In your Shopify admin go to Online Store → Themes → Customize, open a product page, choose Add block in the product information section and pick Best before under Apps. The block shows the selected variant's date as Best before 7 Nov 2026, marks it Use soon inside a window you choose (30 days by default), and shows nothing at all on products without a date. Label, date format and the window are block settings; removing the app removes the block.
Automatic markdowns
Datima can also lower the price as a batch nears its date and put it back when the batch is gone. The Markdowns tab shows the ladder — by default 10 % off within 30 days, 25 % within 14 and 40 % within 7, always off the regular price, never compounded, with a cap you set — and today's list: every variant the rules reach, the batch that decides it, and the price before and after. Nothing is written to your store until you switch the tab to Live; switch it off and every price goes back. Change a price by hand and the engine releases that variant and leaves it alone until you say otherwise; the tab also shows what the markdowns sold over 7, 30 and 90 days and every price change it made. Markdowns are free and switched on per store: the card in the app opens a chat with us, and we turn them on for you.
A Clearance collection in one minute
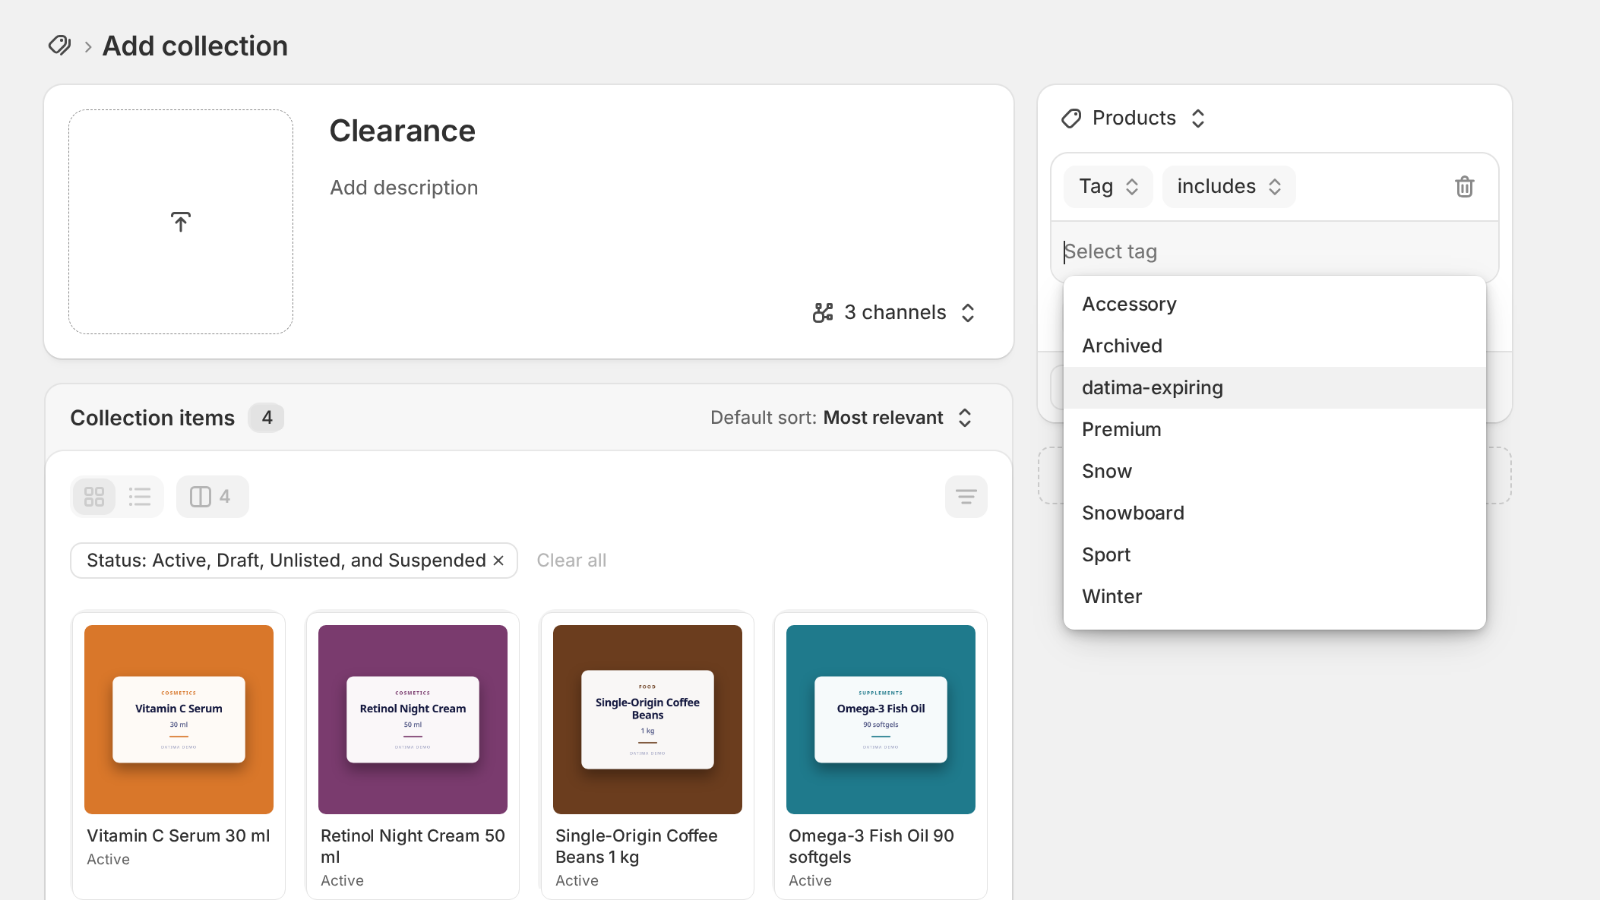
When automatic markdowns are on, every product Datima is currently discounting carries the tag datima-expiring, and loses it the moment the last discounted batch is sold or the price goes back. A collection that follows it builds itself: in your Shopify admin go to Products → Collections → Create collection, name it Clearance (or Short-dated), choose Automated, set one condition — Tag · includes · datima-expiring (the tag appears in the picker once a product carries it; typing it works before that) — and save. Add it to your menu; from then on it fills and empties without anyone touching it. On the product page the Best before block adds a line while the price is reduced: Was $4.50 · short-dated, best before 5 Oct 2026, or the percentage when the product already has its own compare-at price. Both follow your storefront language.
Writing expired stock off
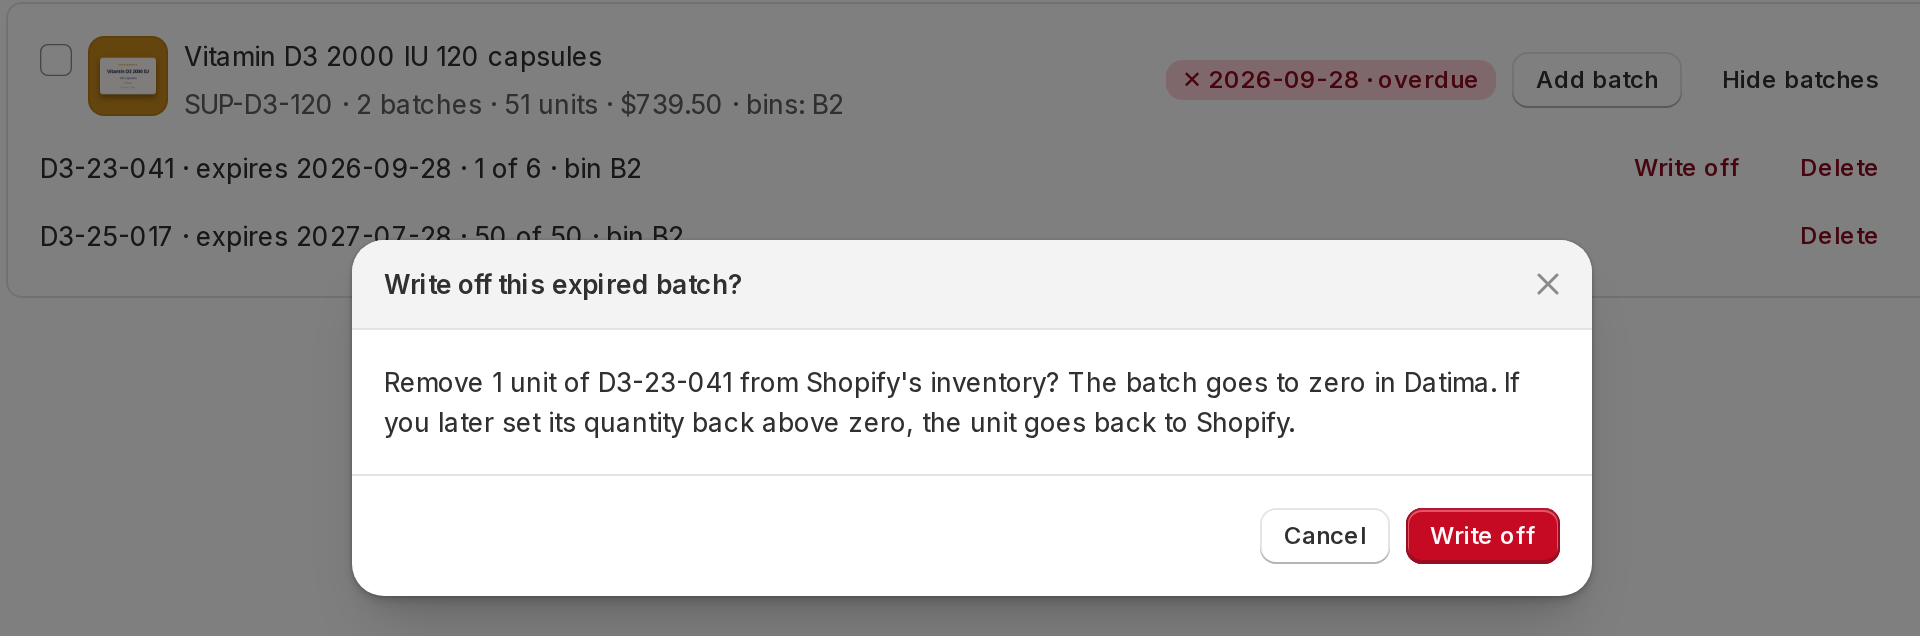
When a batch passes its date with units left, Shopify is still counting them as available. On the batch row — in Products with Show batches open, or on the product's page — press Write off. One confirmation, and Datima removes the batch's remaining units from Shopify's inventory at the batch's location (a normal inventory adjustment, reason shrinkage, with a link to the batch in Shopify's inventory history) and sets the batch to zero, in one operation. The row then reads Written off −6 · Main warehouse. The first time, Datima asks for Shopify's inventory permission in a dialog of its own, then Shopify asks in its usual one; nothing is asked at install or on opening the app. If you later set the batch's quantity back above zero, the units go back to Shopify, capped at what was taken; a batch without a location in a store with several asks you which to adjust. It is never automatic: one press per batch.
Ninety seconds of the app in motion:
6. Plans and limits
Datima is free with no limit on tracked products while it is in early access. If paid plans ever arrive, viewing and exporting always keep working — you are never locked out of your own data. See pricing.
Frequently asked
I have several locations. Does it matter which one a batch is at?
Record the location when you know it and Datima deducts from the batch at the location that fulfilled the order. Leave it blank and the batch counts for the product as a whole. A batch is never taken from a different location than the one that shipped.
Some of my stock has already expired. Can I still import it?
Yes, and you probably should — finding it is often why people install the app. Past dates import with a warning, not an error, and show up under Expired on the dashboard.
Can I delete a batch that has already had sales?
No: those sales point at it. Set its remaining quantity to zero instead, which is what "used up" means, and the history stays intact.
What does the app read from my store, and what does it write?
It reads products, variants, locations, inventory levels, orders and fulfillments. It writes one thing: a product metafield with the earliest expiry date, and only if you leave that setting on. Your order and customer data never leaves the app. See the privacy policy.
How do I uninstall cleanly?
Uninstall from your Shopify admin like any app. Export your batches first if you want to keep them (Products → Export batches); the app deletes your data after uninstall in line with Shopify's requirements.
Questions? support@datima.ai · Last updated 21 September 2026